Top-Notch Soundtrack Creation Tool Gets Better with a Redesigned Interface, New Features
Few pieces of content-creation software are as efficient — and as fun to use — as SonicFire Pro. The basic value proposition hasn't changed much over the years. SonicFire helps busy video producers, editors and motion graphics designers get more out of licensed music first by automatically generating tracks that exactly fit the length of a piece of video, then by offering endless customization options that allow industrious users to dial in the perfect match between aural and visual elements.
Want to transition from quiet, stripped-down instrumentation in your intro to a full-on orchestral blare? No problem. Want only the percussion from that driving techno track? One click does the trick. Would this tune be perfect if it the tempo were just a little bit faster? As always, SonicFire has you covered.
This year, SmartSound has overhauled the user experience to bring it in line with trends in other content creation tools. I wouldn't quite call it intuitive; first-time users won't immediately understand how to manipulate a music track on the timeline. But the UI masks a great deal of complexity on the surface level, making lots of features available with a mouse-click.
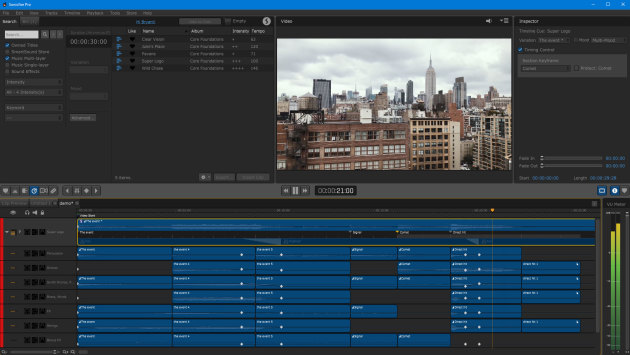
The Sonicfire Pro interface has just a few panels. The top part of the screen features the search panel, which allows users to browse and preview music tracks, and the bottom part of the screen is dominated by the timeline and VU meter. A few more panels — the Video window, the Inspector window and the Markers window — appear and disappear in the top right portion of the interface depending on context.
The Search panel features stacked checkboxes that allow track listrings to be filtered. You can set it to show only titles you already own, everything available in the SmartSound Store, or only the advanced "multi-layer" titles that allow you to adjust the mix and instrumentation. Each track's intensity and tempo (beats per minute) are specified in columns that can be sorted with a click so that you can quickly find the most/least intense or fastest/slowest tracks. After you highlight a track title, a preview file downloads in a flash, allowing you to quickly audition the track and move on to the next one if it's not to your liking.
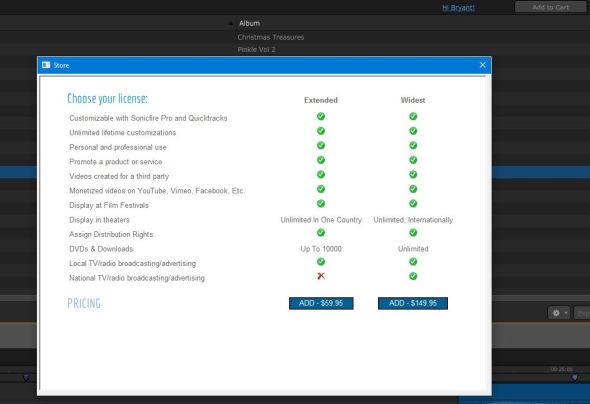
Using a track will cost you, of course. Licenses can be purchased right in the app (the price is typically $60 for a single track, or $150 if you require rights for international theater display, national TV or radio broadcasting and advertising or more than 10,000 DVDs or downloads), and once you've downloaded a purchased track, the fun begins. First, you set the duration of the video that you're setting the track to. (It's easy to set the music clip to loop, too, in case that's what you need.) Next, you can try out the different Variations that SonicFire Pro generates on the fly, using different parts of the underlying composition to create multiple versions that fit your time requirement. And then you can sample different Moods, which are remixes of the song's instrumentation to emphasize and de-emphasize different elements. Don't like the trumpet gliding over the top of that jazz track? Choose a "background" or "drums & bass" mood to drop out the lead instrumentation. Or click the "Advanced" button, select "Adjust Mix," and turn the trumpet slider all the way down. Easy.
The second panel in the basic interface is the timeline. Once you're ready to use a music piece and have specified the duration you need, you simply drag it to the timeline and get to work. If you like the way it sounds already, great! You can export it as a WAV or AIF file and bring it into your NLE. But you have more options to make it more closely match your video.
Opening a video window inside Sonicfire Pro helps users make musical choices that sync with their edited program. Click to load a full-resolution version.
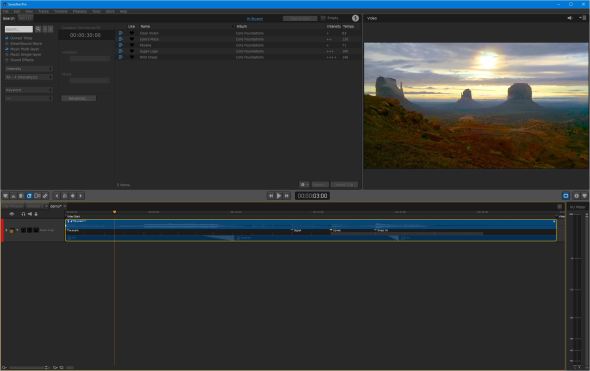
At this point it will probably be helpful to bring your video into Sonicfire Pro so that you can sync the music to your picture. Just pull down File > Choose Video from the menu bar. The video will display in a new "Video" panel next to the search panel. To synchronize Sonicfire moods with certain edit points in your video, just scrub the playhead to those points and select the Mood Map track, which runs right below the music waveform on your timeline. Either click the Add Mood button in the toolbar or right-click on the Mood Map track and use the context menu to add a new Mood.
When a Mood segment is selected on the Mood Bar, the Inspector window displays the current Mood along with a dropdown menu for selecting a different one. It also displays the available layers of individual instruments or groupings of instruments in the current track, along with sliders allowing you to quickly adjust the mix manually. You can drop the drums out of a track entirely or pump up the bass to achieve exactly the right effect for a clip. And the newly retooled interface makes it simple.
If your needs are more complex, you can invoke Sonicfire's newly expanded Timing Control feature by clicking its toolbar icon or checking the box in the Inspector window. This gives you timeline access to Smart Blocks, which are the fundamental building blocks of Sonicfire soundtracks. In Timing Control mode, an extra track appears on the timeline with a beat ruler marking off the beats and keyframes denoting different sections of the song. This allows you to swap out and replace those sections, which may yield better results than relying on Sonicfire's algorithms to generate the full track. It also allows you to align sections of the music with markers in the video, or to precisely align the Mood Map with changing sections and beats in the music for a more dramatic overall effect.
Because the remaining sections of a musical piece get reassembled every time a section change is made, working with Timing Control can get a little dicey, sometimes creating transitions that don't sound as smooth as the ones that are generated automatically. That means the onus is on editors to audition their reassembled versions to make sure there aren't any ugly breaks in the sound. A new "Protect the End Region" function helps mitigate the effect by allowing users to lock material near the end of the soundtrack so that the concluding portion isn't reworked every time a change is made.
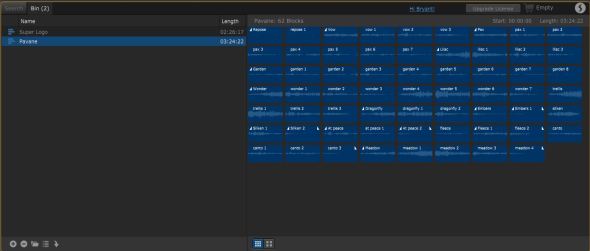
Smart Blocks are viewable in the bin and can be dragged-and-dropped onto (or, with a right-click, insered into) the timeline. Click to load a full-resolution version.
Power users still have the ability to customize soundtracks to the nth degree by accessing the individual Smart Blocks that make up a musical theme. Clicking over to the Bin tab of the Search panel allows dedicated music mavens to take full control over the way Sonicfire slices, dices and loops a musical piece by dragging the individual musical snippets to the timeline in order, rather than allowing the automated algorithms to do their business.
A tremendous array of music-editing options is available directly on the timeline. Click to load a full-resolution version.
And you can also click an audio track's twirl-down button to expand it to show all of the instrumentation and sections, including volume controls to help manage fades and transitions, allowing you to experiment with the whole jigsaw puzzle by clicking and dragging. It's up to you whether you want to dedicate time and energy to mastering the ins and outs of the Smart Blocks system or just let your computer do most of the driving. But SmartSound has negotiated a balanced compromise between the complexity of a digital audio workstation and the ease of use of a desktop productivity tool.
In addition to the interface redesign, SmartSound has added a new Cut-Video-To-Music feature that works with Adobe Premiere Pro CC and Apple Final Cut Pro X. It's deceptively simple. Once you have your track just the way you like it in Sonicfire Pro, you can tell the program to export the audio file with markers at every beat, only every strong beat, or at the edge of Blocks (usually but not always two bars of music), Sections (changes in Moods or Variations that you've specified), or Files (in the case where you have multiple sound files, perhaps including hits and sound effeects, stacked on the timeline in Sonicfire). When you import the resulting AIF or WAV file into your NLE, the markers show you exactly where the key musical moments are happening.
Yes, you can glean a lot of this information just from looking at the shape of the waveform in your NLE. I shrugged it off at first. But it turns out that it's really nice to have the markers visible in your NLE. They may suggest final tweaks to the edit that can be made easily to bring the imagery into close sync with the music. I'm not saying it's a great idea to mickey-mouse your edits with the beats of your music on every project. But sometimes it does make sense, and sometimes that's just what the client wants. This feature will help you do it quickly.
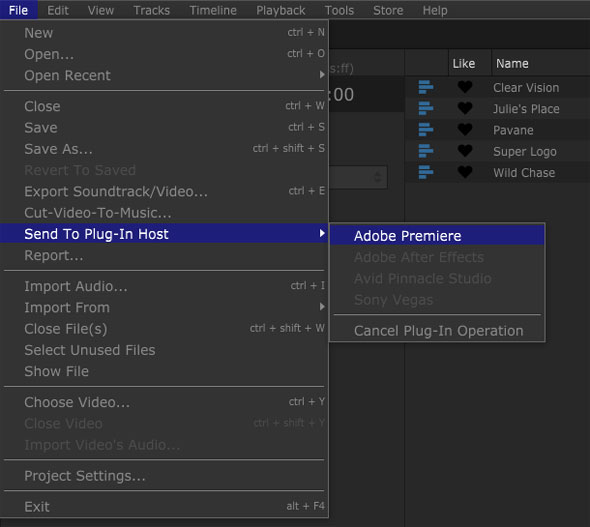
The round-trip with your NLE of choice can be better integrated if you purchase the appropriate plug-ins.
Editors who have grown accustomed to the integrated roundtrip workflow between applications in, for example, Adobe's Creative Cloud suite may find the methodology here to feel a little out of date. It's not complicated, but there are extra steps involved to export media from Premiere and import it into Sonicfire, and vice versa, especially if you end up doing multiple iterations. Fortunately, SmartSound does offer plug-ins for Adobe Premiere Pro and After Effects, Apple Final Cut Pro X, Pinnacle Studio and Sony Vegas. I tested the Premiere Pro plug-in and it eliminated the headache of moving between apps — basically, you double-click the sound file in Premiere to launch Sonicfire and work with it on the timeline there, and you pull down File > Send to Plug-in Host to move the same file, with your new changes, back to Premiere Pro.
Disappointingly, the Cut-Video-To-Music feature is not integrated with the plug-in; markers in Sonicfire will not be displayed in Premiere Pro without exporting and re-importing the audio file. (However, the markers will survive the round trip if you bring the file back into Sonicfire after sending it to Premiere.) The plug-ins for Premiere Pro, After Effects, Final Cut Pro X, and Sony Vegas are $50 each, and the Pinnacle Studio plug-in is $30. That seems like a lot compared to the $199 price of the full program, but it's probably worth it just to get one more bit of fussiness out of your workflow.
At the end of the day, Sonicfire Pro remains a wicked-cool piece of software. The simple interface yields excellent results with a bare minimum of fuss, while a plethora of options on and off the timeline enable hands-on tweaking to eke out that extra degree of perfection. While I think of SonicFire Pro as a massive time-saver, in that it allows you to very quickly edit and customize library music tracks to fit your video's length and mood with just a few drag-and-drop operations and menu selections, it's also a powerful and highly entertaining creativity tool. It offers the ability to quickly iterate through near-infinite variations on a music soundtrack, and that can give you ideas that will really help sharpen up your edit in a final pass. The only danger is that you may become addicted to trying out new possibilities — and that won't be good for productivity at all.






WARNING on Smartsound:
Smartsound does not defend the licenses they sell against constand false claims for copyright infringement. There are companies such as AdRev that contract with artists who sell their music to Smartsound that have automated software that file copyright infringement claims on Smartsound licensed music. Smartsound is fully aware of this long-standing problem but does nothing about correcting the bogus practice. Smartsound leaves it up to their customers to individually fight the infringement claim. Meanwhile, ads are placed on the video and the work of the video owner is monetized without their permission. And if videos are produced for clients for YouTube distribution, the producer will be embarrassed with clients who find ads running on their paid content. Very bad situation. Don’t use Smartsound if you don’t want the hassle and embarrassent.
I much prefer version 5 over 6 currently. I find 5 easier to work with unfortunately it won’t work on my new computer.